Consistent Colour For Negative Film Scans

Not happy with all-over-the-map colour from negative film scans? If you have not already familiarised yourself with my introduction to scanning colour negative film I am more than happy to wait until you have read Scanning Colour Negative Film 101, Scanning Colour Negative Film 102 and Scanning Colour Negative Film 103?
All done? Then read on…
Do you feel a little let down so far? Were you hoping there might be some way that the whole process could be a little less — well, arbitrary? I mean, Kodak and Fuji pour millions of dollars and yen into making that film capable of good colour accuracy. And all those guys in Hollywood seem more than capable of getting consistent colour from frame to frame and reel to reel when they shoot colour negative film.
Fear not, gentle reader. The same questions wouldn’t leave me alone. I Googled and I trawled. Silverfast has scanning software with so-called “profiles” for various historic emulsions. Vuescan do a thing they call profiling negative film that involves a few steps. Are any of these workflows truly deterministic or consistent? No. And whilst there are many solutions for making custom IT8 profiles for your scanner for various slide film emulsions there is nothing similar for negative film. Feel like giving up? That’s what everybody else does.
If we want to get ahold of this wet bar of soap called colour negative film we need to start nailing it down. The first few steps are covered in my previous scanning tutorials:
1. Turn off any auto or colour correction settings in your scanning software
2. Set a manual exposure and scan as positive (equalising the three colour channels if possible)
3. Invert using ColorPerfect’s ColorNeg mode using an appropriate film setting
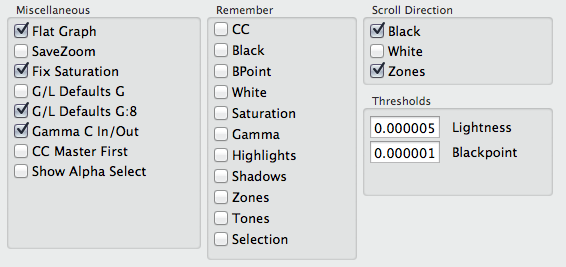
OK. Let’s start with step 3 there. ColorPerfect is still not a fully determinate system. The imaging science is sound but the software is set to do some automatic calculations as to white and black points and overall white balance on each new frame. It also maximises contrast. All good things to have but if we want consistency we will need to lock it down. Here is the method:
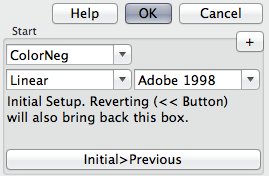
1. Store the settings for the calibration frame (this should be a frame with a good range of tones from bright to dark and with something colour neutral to colour balance with in it) with all boxes ticked for carryover in a named slot in CC Master. This involves getting the image looking as you want it in ColorPerfect and then goind to CC Master, choosing a slot in the list, typing a new name, hitting “Insert” and then clicking OK. In the example screenshot we have saved a CC Master bank called “UK Reala”.
For each subsequent frame:
a. Hit Previous to restore artistic settings
b. Hit plus to get to CC Master panel
c. Apply the CC Master slot stored earlier
This method will enforce the exact same settings for white point, black point, colour balance and contrast without recalculating. One thing you still may find, however, is an inability to get the colours right.
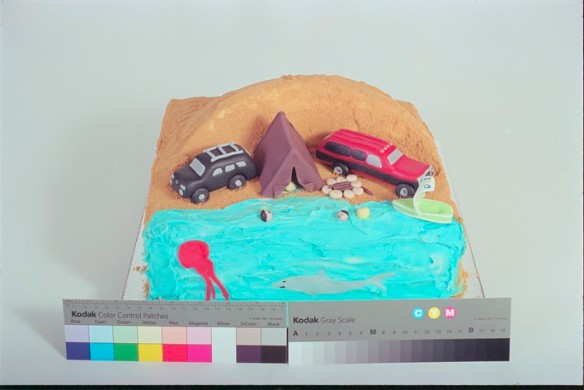
I had a large set of rolls of the same emulsion taken in the same camera on the same trip and I was having my usual problem: Red. Check this out:
Things I knew were fire engine red were coming up a sort of maroon orangey-red colour. This, even whilst my neutrals were neutral and a good greyscale was possible. It was only when I realised that I could fix it with Lightroom’s “Camera Calibration” module that I started to suspect what was really going on. The purpose of the Camera Calibration module is to allow you to shift the hue of the RGB primaries. This was the source of my problem. Without any input profile there was no reference for the RGB primaries on my scan (my scan being a straight unmodified linear gamma 1.0 scan as is recommended for ColorPerfect).
Allow me to save you the large amount of time I wasted using my collection of Wolfe Faust IT8 targets (excellent value for money, BTW) and my copy of Rough Profiler trying out every imaginable parameter and emulsion in search of a good input profile. Don’t get me wrong, I got some good ones. The problem is that the good ones are limited in scope to the brightness range of the slide (cLUT profiles). The “universal” ones (curve or shaper profiles) were noticeably less accurate. And even the accurate ones did weird things with some tones because of the limited coverage of tones on an IT8 target. People that do this stuff professionally buy HutchColor targets for $500. Er, no.
It occurred to me that Nikon Scan installs a bunch of profiles for the scanner but they don’t show up in Photoshop or other imaging applications. I tracked down why this was. Nikon had altered the metadata in the header to make them not appear to be valid. Specifically, they changed the “type” from “scnr” (a scanner or input profile type) to “nkpf” (a non-standard value). If you take a hex editor (or even vi) you can just find the value “nkpf” in the first few lines of the file and change it to “scnr” and you will get access to use the profile in any application of your choosing.
To cut a long story short, the Nikon LS9000 profile for negative film (NKLS9000_N.icm) was far and away the best profile of all of them for my negative scans and much better than any of the ones I had managed to make. I determined this by a long process of coming back to a number of key images with colours that were very noticeable when slightly shifted. I also have an Epson V700 for bigger film. Fortunately, the Epson icc profiles work without fiddling and there are just two: one for film and one for reflective art.
So how does this all work together then? It’s fairly simple but all the steps are essential and the sequence is important:
1. Set your image application working space to AdobeRGB. You will find this somewhere in the Preferences (or Color Settings in Photoshop). This is a one-time step but essential
2. Open your linear raw scan from your scanner in your imaging application
3. Assign (or Apply) the colour profile for your scanner to the file. This is important: Apply, NOT Convert
4. Call the ColorPerfect plugin. Go to options. Under “Miscellaneous” put a check in the box for “Gamma C In/Out”.
Click options again to leave the options pane. You will now have an “In” and “Out” box. Set “In” to “Linear” and “Out” to “AdobeRGB”. This setting should be remembered by the software
5. Select an appropriate film type. I recommend getting a good looking image with a little spare headroom in the highlights and locking it down as described in the previous section on locking down ColorPerfect
6. After you have OKed out of ColorPerfect Convert to your working colour space of choice. This can be AdobeRGB or any other reasonable and well-behaved working colour space
Did that seem too easy? Wondering why no-one has discovered this before? The devil is in the details my friend. Skip or get in wrong sequence any of these steps and you will be back to colour negative film mystery meat land as before. Use these steps consistently, however, and you will be rewarded with rich, colour-accurate images with a startling naturalness to them. Here’s that image again only beneath it I’m going to place the version that was made using this workflow and the Nikon icc profile. Both are from the same scan tiff. Both are with the same ColorPerfect artistic settings. Both have been neutral white balanced using the grey square under the “Black” text from the colour chart on the left.
Old and busted:
The new hotness:
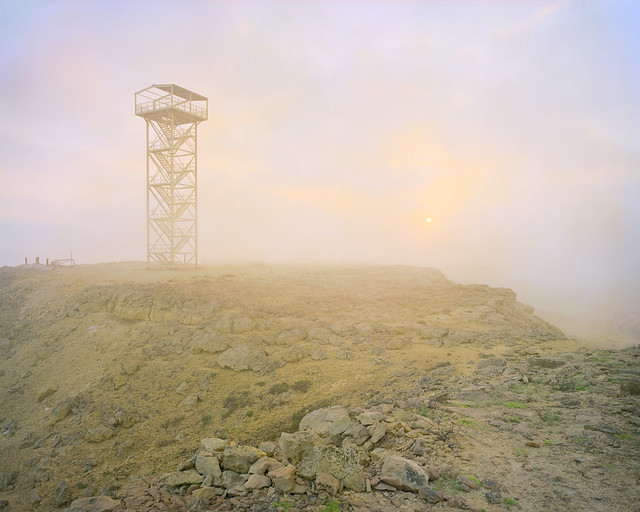
For all the time and effort I’ve poured into this colour negative consistent colour mystery I can’t believe I came away with something so straightforward. I guess it’s not all that surprising that people weren’t using the Nikon Scan profiles since they are unusable without the above modification. I’m not surprised, however, that they handily outperform any “custom” profile I could cook up. As far as getting the right sequence and workflow there are a surprisingly large number of wrong turns you can take. Trust me, I’ve taken most of them. I have successfully used the same workflow using linear raw scan tiffs from Vuescan from my Epson V700 and the Epson Film icc profile. Here’s a sample from the V700. It’s a 4×5 sheet of Kodak Ektar from my Crown Graphic:
It’s my hope that this humble tutorial can help film shooters everywhere get awesome colour. After all, if you really want crap-looking colour there’s always your iPhone and Instagram filters. Keep shooting film and keep film awesome!


Pingback: Scanning Colour Negative Film 103 | smashandgrabphoto
Pingback: The Science and Pseudoscience of ICC Profiles and Scanning Colour Negative Film | smashandgrabphoto
This is genius! After a lot of struggle with Vuescan driveing my Coolscan V I was able get scans that after a lot of tweaking (mainly due to red color cast) in ColorPerfect and PS looks pretty OK. When I found your method everything now works really smooth. I appreciate that you share your findings with the rest of the world.
I done a few test using this method on slides as well. I think it turn out great to my eyes, but I haven´t any IT8 profiles to compare with (mainly shooting Provia 100F). Do you still think is worth to profile your scanner when doing slide scans?
Best regards
Björn J
Sweden
I’m curious if you have any recommendations for me. I scan negative film using my girlfriend’s Nikon D3300, a macro lens, and some daylight-calibrated fluorescents for backlighting and, like you, I want to push that to the next level and develop a system to get consistent results every time.
My current plan is to convert the raw images to linear rgb using imagemagick (making sure to calibrate my WB to match the light source I scan with), set the white and black points to match the fully-exposed leader and un-exposed edge of the film in Photoshop (these would change with every roll), then set neutral grey to match a processed photo taken with the same film stock of an 18% grey card under identical lighting (this would ideally not have to change with every roll).
My question is: do you see any potential problems with this? If I were to make my own LUT to get more-consistent color, can that be done from a chart under “neutral” (for this process) lighting too?
Well, of course my first recommendation would be to get a real scanner. 😉 My second recomendation would be to buy some colour filters and make a filter pack for your DSLR scanning. The reds are typically up to four stops brighter than the blues (depending on emulsion) on colour negative. Expose not to clip the reds and you will have very little blues left. Scanners can expose the three primaries differently by using longer “dwell” on the weaker colours. For the DSLR I would build a filter pack that comes close to neutralising the mask. This is what I did when I dabbled in this area.
Since I wrote the last article I’ve been further refining my process. It’s probably almost time for a new one. But basically, I would say it will be very good to get a good camera target to use for including in shots and building profiles from. The cLUT profiles are a great idea but they have one fatal weakness: They are only valid between the blackest and whitest square on the target. Now, in most of my real world scenes there are things (sun, lights…) brighter than the whitest square and other things (like deep shadows) that go darker than the blackest square. When the data from the cLUT profile hits these values things get VERY ugly. For this reason I find my best results come from Gamma+Matrix type profiles. These sorts of profiles will smoothly transition from the brightest and darkest things on your target up and down to absolute white and black. The results on real pictures are generally superior. Of course, if you do happen to have a particularly low contrast scene that fits in the range of the target you might find the cLUT profile preferable. I think this will be a rare occurrence, though.
The other thing you might want to do is capture your target in a range of lighting situations in order to make a range of profiles. See what you like! And let me know what you find.
Sam
Hello,
I own an Epson V700, where can I find the ICC profiles, both for film and reflective art? Could you please tell me how do I load the Epson Film ICC profile on VueScan?
Thanks a lot. I have tons of difficulties on scanning my color negs and your tutorials are restoring my faith in the process, heh.
Dear Sam,
1.5 years ago I gave up on scanning with my coolscan 9000 / vuescan / RGBI raw-scan / colorperfect / photoshop pseudo workflow. No matter if slide or negative, the colors and contrasts were ugly. First I assigned Adobe-RGB resulting in hot reds. Later I tried sRGB with slightly better results but still disappointing. Too much time consuming for too worse images. Last week I stumbled over your ingenius blog posts and it worked out very well. Thank you very much for this game changer! Now, owning about 6000 slides and 15.000 negatives scanning is dead slow. Seeing the Nikon D810 dslr (14bit ADC, 14 EV dynamic, 36mpix) and the AF-D 60mm micro Nikkor I could use maketiff from colorperfect to demosaic the raw files but then: Which icc profile to assign? I never Gamma+Matrix profiled my camera: Do you have a suggestion what to use? Is a profile necessary even for slides?
Regards
Andreas
If you are looking to scan such a large volume of material I can easily understand why you want to use the DSLR. I would advise you to take some time to come up with a rig that allows you to shoot a lot of frames without wasting time having to reshoot. The big enemy, in my experience, is not getting the film fully flat and fully parallel to the sensor. I would try to obtain a Nikon slide copying attachment. The second challenge will be consistent even backlighting for the film. Since the DSLR has to capture all the primary colours at the same exposure (unlike the scanner) I would construct a filter pack for use with the negative film which will largely neutralise the orange mask colour. Good luck!
You should be able to make a profile for your DSLR scanning rig using an IT8 target slide just as you would with a scanner. When making your own profile I would definitely create a gamma+matrix type profile.
Thank you for answering, Sam!
A Gaffa taped Nikon ES-1 should work as copy rig. On my scanner, I adjust the analog gain until the raw-curves endpoints are falling together, more or less like ETTR for each channel. Rosco filter samples are cheap, so building a filterpack to get near enough to neutralise the mask doesn´t sound too complicated to need Good Luck. Fatal mistake? Consistent backlighting with something like a SB-910 taped down to the desk, filterpack loaded in a clip on diffuser plus the ES-1 diffuser to even out the light. Is using a IT8 target to calibrate for negative ok? Which software can I use to build a gamma+matrix profile, I am really clueless.
Andreas
For profiling I would simply use whatever profile came from the manufacturer for your DSLR. If you like to tweak I rather like RawTherapee as a tool for working with the camera RAW files.
Hi Sam, Thank you for sharing your work. I am currently ploughing through 101,2 and 3. Admittedly the leaving curve is steep. I recently started using the Nikon 9000, I’d love to implement your methods but am unsure about “step 3. Assign (or Apply) the colour profile for your scanner to the file.” (on this post) I’d very much appreciate if you could clarify what the ‘scanners colour profile’ is.
Kind Regards, Giu.
You need to re-read the bit about “NKLS9000_N.icm” in https://smashandgrabphoto.wordpress.com/2014/03/19/scanning-colour-negative-film-with-consistent-colour-using-icc-profiles/
Basically, when you install the Nikon Scan software it installs a set of profiles for the scanner (probably in different locations depending on Mac or Windows). These are normal ICC profiles but they won’t work in most other software because Nikon changed a little flag in the file which you can easily change back.